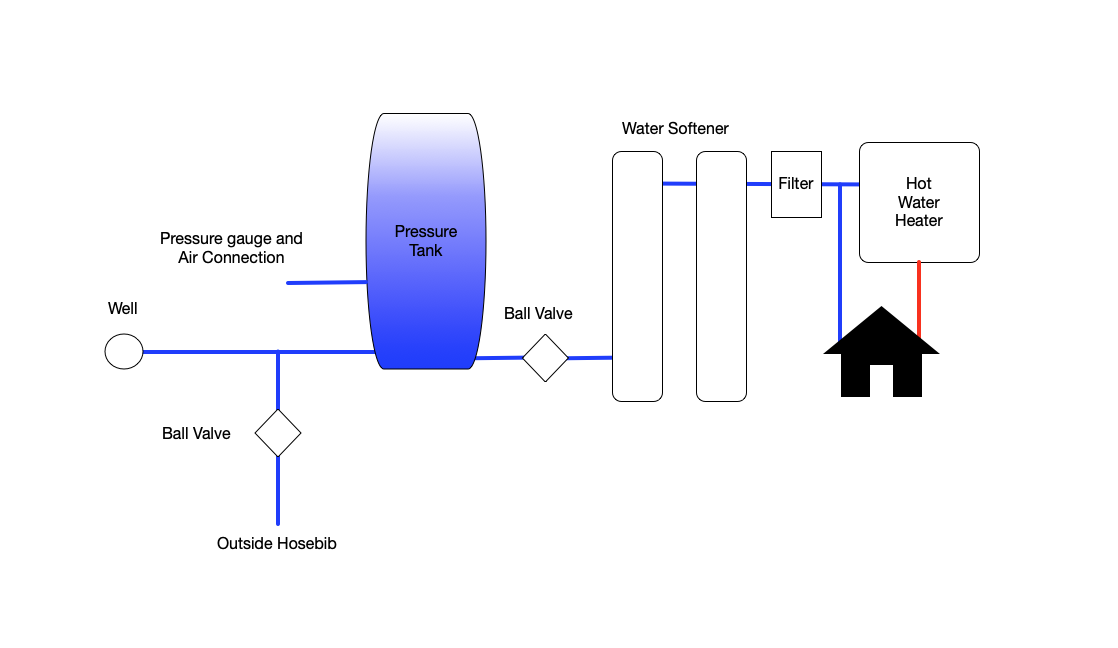
In many homes, a private well water tank regulates the water that runs through the faucets, showers, and toilets. It extracts water from the earth and uses 40 to 60 pounds per square inch (psi) of pressure to pump it into your plumbing system. Inefficient air pressure may be one of the causes when the water's pressure dips below the intended level. So, the question arises, How to add air in a well water pressure tank?
1. Understanding Your Pressure Tank Type
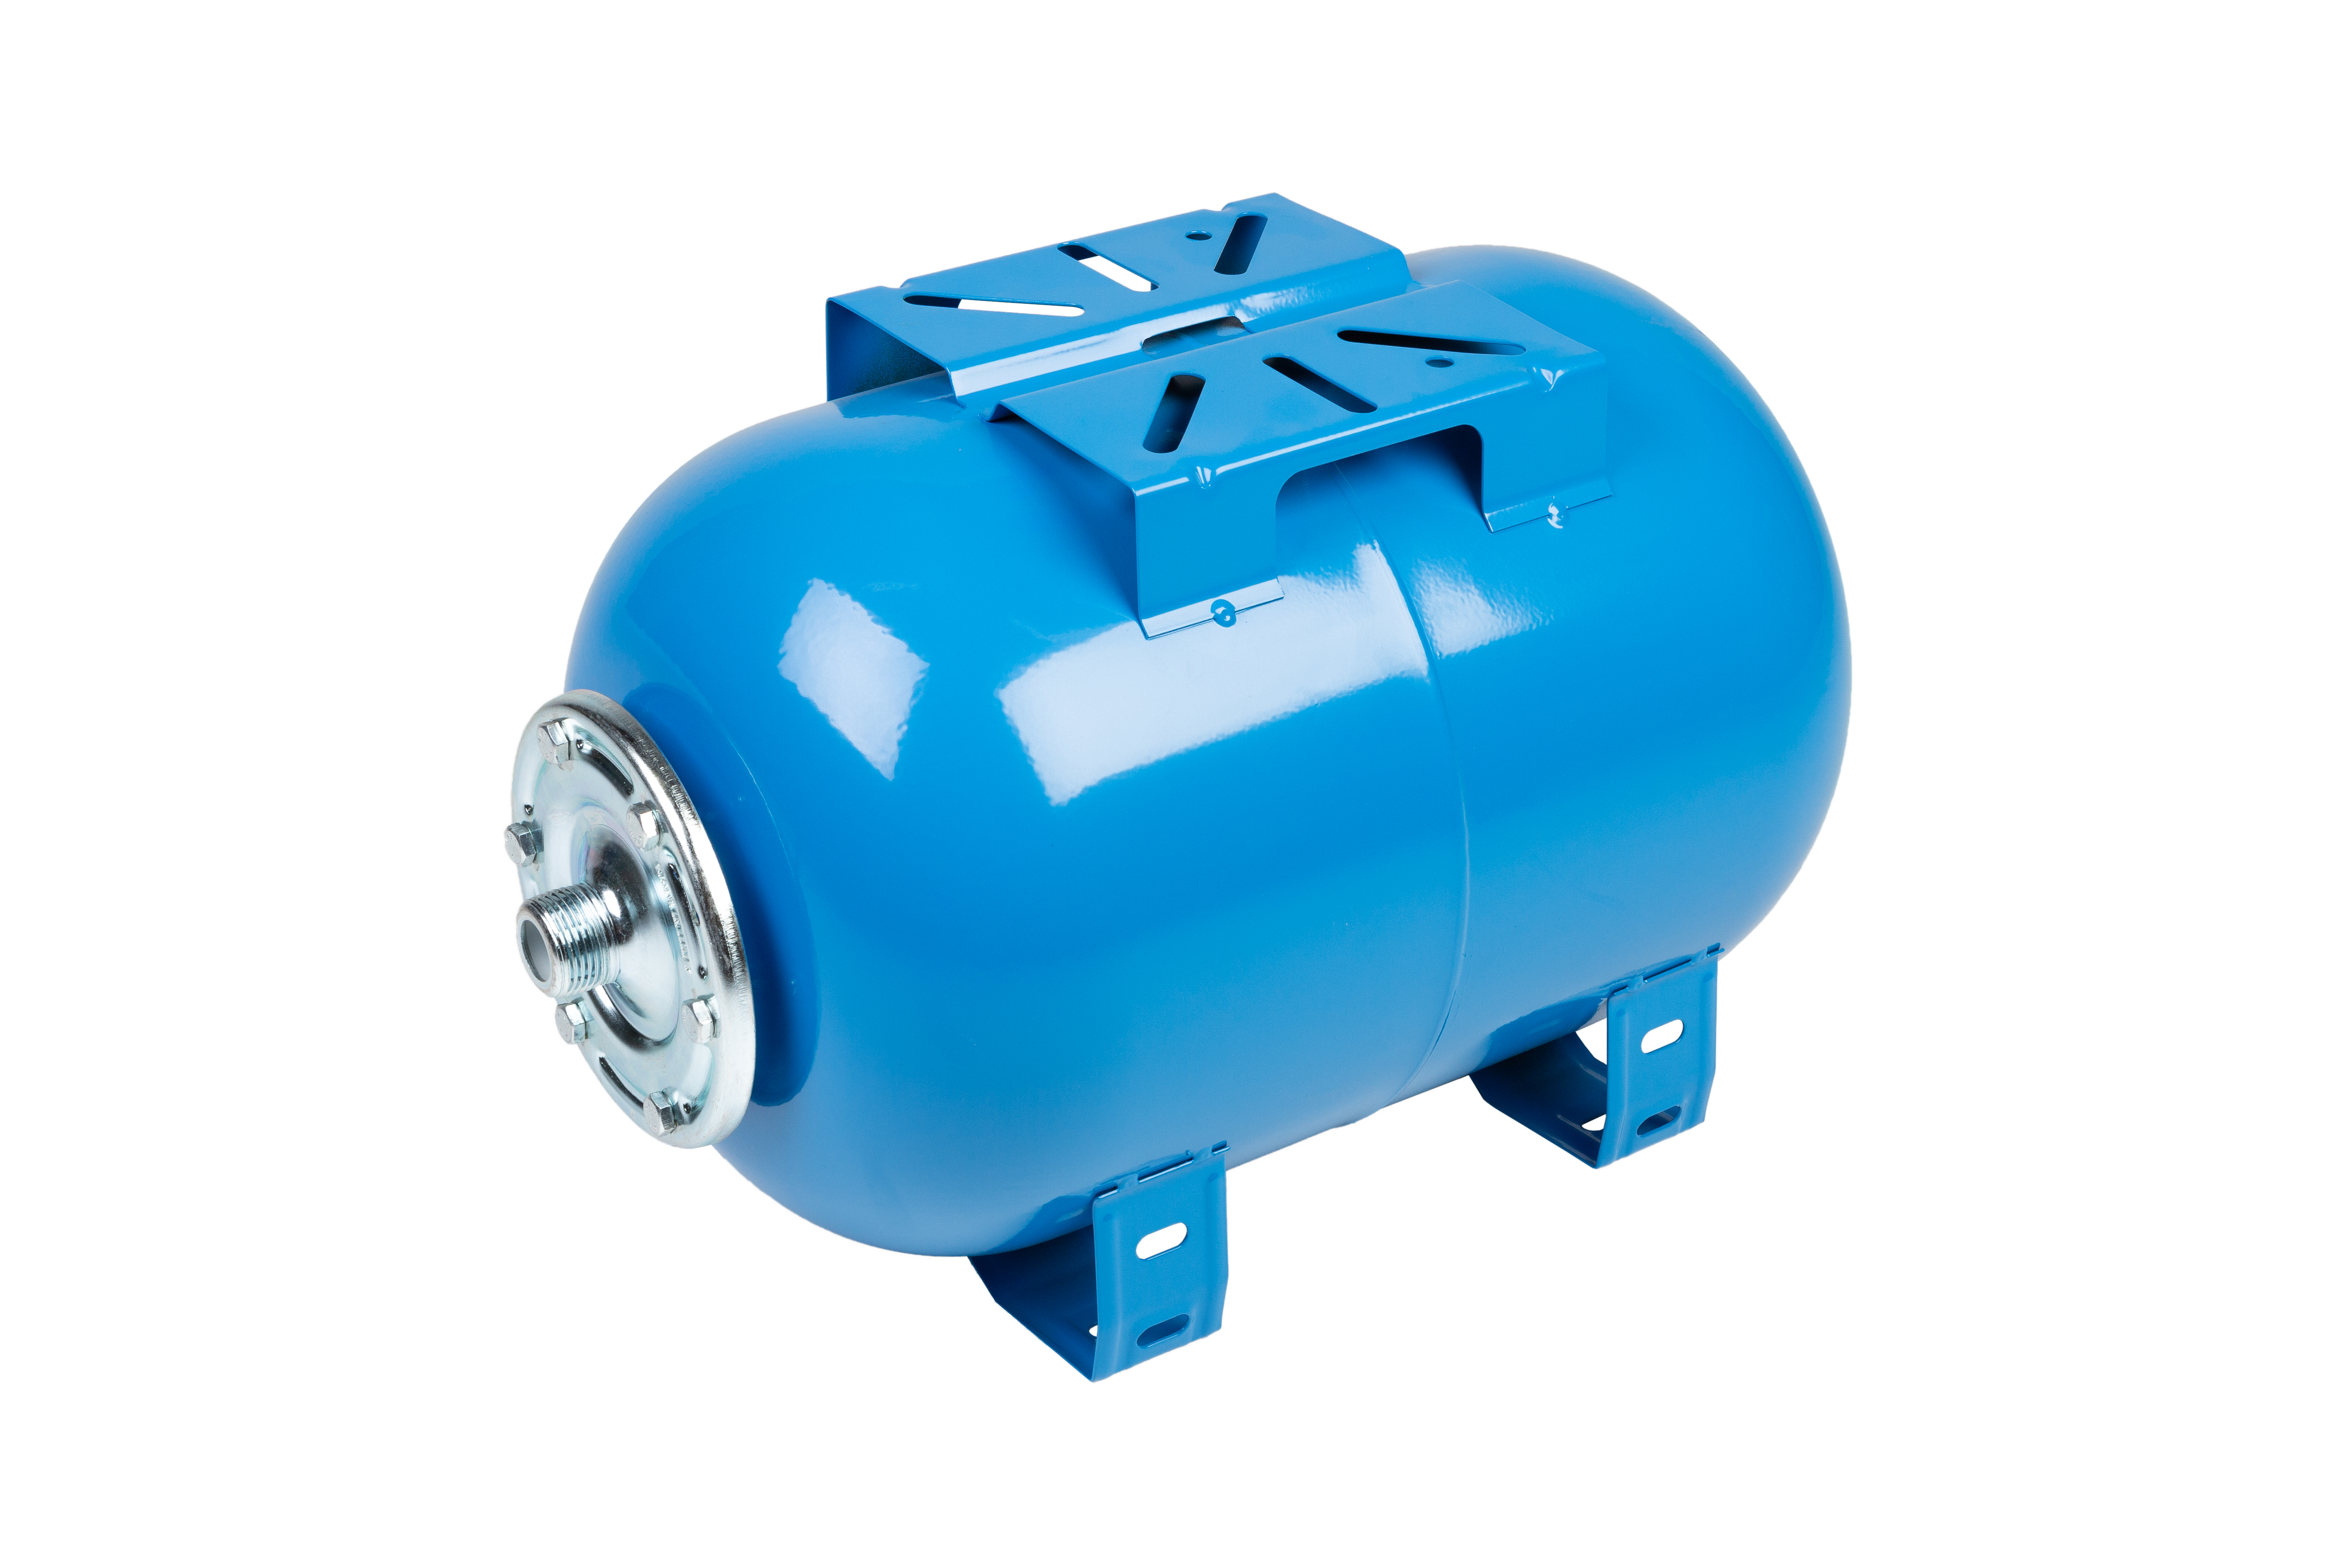
Keeping your water system functioning smoothly depends on a crucial component: the pressure tank. But with two main types, bladder tanks and diaphragm tanks, understanding which one you have is key to proper maintenance.
Here's a breakdown of these two types and some tips to help you identify yours:
1. Bladder Tanks
- Imagine a flexible rubber inner bladder separating air from water inside the tank.
- The bladder expands and contracts as water is drawn and replenished, maintaining pressure in the system.
- These tanks are generally lighter and more corrosion-resistant.
2. Diaphragm Tanks
- Instead of a bladder, a single, fixed diaphragm separates the air and water chambers.
- This diaphragm flexes inward as water enters the tank.
- Diaphragm tanks are often less expensive but may require more frequent maintenance.
Identifying Your Tank
- Check the manufacturer's label. Look for any information on the tank itself that might indicate the type.
- Consult your system manual. If available, the manual should specify the type of pressure tank included.
- Visual inspection. Some tanks may have a visible air valve on the top. If present, it suggests a diaphragm tank, as bladder tanks typically have the valve located on the side.
Why Identifying Matter?
The process for adding air to maintain pressure can differ slightly between bladder and diaphragm tanks. Using the wrong method can damage the tank or compromise its effectiveness. Therefore, identifying your tank correctly is the first crucial step in ensuring proper maintenance.
2. Checking The Current Air Pressure
To begin checking the current air pressure in your well water pressure tank, you'll need a tire pressure gauge. These inexpensive tools are readily available at most hardware or automotive stores.
Start by locating the air valve stem on the top or side of your pressure tank. It frequently resembles a tire valve and might have a cap. Once located, remove the cap and firmly press the tire pressure gauge onto the valve stem to obtain a reading.
Now, let's talk about the ideal air pressure level. Typically, it's recommended to maintain the air pressure in your tank at around 2 psi below the cut-in pressure of the pump switch. This cut-in pressure is the lower threshold at which the pump starts working to replenish the water supply.
You can usually find this information either on the pressure switch itself or in the documentation provided with your well system. It's essential to ensure the air pressure aligns with this specification to prevent unnecessary strain on the pump and maintain optimal performance.
Once you've obtained the pressure reading, compare it to the recommended level. If adjustments are needed, you can add or release air using a tire pump or an air compressor.
By regularly checking and adjusting the air pressure in your well water pressure tank, you'll help prolong the life of your system while ensuring consistent water delivery throughout your home.
3. Preparing To Add Air
Before adding air to your pressure tank, safety is paramount. Here's how to properly depressurize the system:
Power Down -Locate the breaker box or fuse panel controlling your water pump. Turn off the breaker or remove the fuse dedicated to the pump. This will ensure no power is sent to the system while you work.
Open A Faucet - Choose a low-lying faucet in your house, preferably one furthest from the pressure tank. This allows complete drainage. Open the faucet completely. This allows built-up pressure to escape through the open faucet.
Wait For Depressurization -It may take several minutes for all the pressure to release. You may hear a hissing sound as the air escapes.
Drain The Tank - Depending on your tank type and specific instructions, you may need to furtherdepressurize by draining the water from the tank. Consult your tank manual or manufacturer's recommendations for any specific draining procedures. This step may not be necessary for all types of tanks.
Safety Precautions
- Never tamper with the pressure relief valve on the tank. It's designed to automatically release excess pressure in case of emergencies and should not be adjusted manually.
- Do not attempt to add air while the system is still pressurized.
- Use only the appropriate tools and equipment recommended for your specific tank type.
- If you are unsure about any step or feel uncomfortable performing this task, always consult a qualified professional.
4. Adding Air To The Tank
Once you've safely depressurized your pressure tank, it's time to add air:
Locate The Air Valve
Find the air valve on your tank. It's usually a small brass or plastic valve on the top or side of the tank.
Choose Your Tool
- Manual bicycle pump. A readily available and inexpensive option, but it requires more effort to reach the desired pressure.
- Air compressor. Offers quicker inflation but requires proper pressure regulation to avoid overinflation. Ensure your compressor has a pressure gauge and regulator.
- Tank-specific air injector. Some tanks come with dedicated air injectors for easier inflation. Refer to your tank's manual for specific instructions.
- You can use various tools to add air, depending on your preference and resources:
Connect The Tool
Attach the chosen tool's air hose securely to the air valve using the appropriate adapter if needed. Ensure a tight connection to prevent air leaks.
Monitor The Pressure
- Locate the pressure gauge on your tank. It's typically located near the air valve or on the pressure switch.
- Start adding air slowly and monitor the pressure gauge closely.
Reaching The Target Pressure
- Consult your system manual or manufacturer's recommendations for the recommended air pressure level for your specific tank and water system. It's usually 2 psi lower than the pump's cut-in pressure.
- Add air gradually, stopping frequently to check the pressure against the target level.
Avoiding Overinflation
- Never exceed the recommended air pressure.Overinflation can damage the tank, reduce water pressure, and lead to system malfunctions.
- Stop adding air as soon as the pressure gauge reaches the target level.
Disconnect And Close
- Once you've reached the desired pressure, disconnect the air hose from the air valve.
- Tightly close the air valve with a wrench if applicable.
Re-pressurize The System
- Turn the power back on to your water pump.
- Open a faucet furthest from the tank to allow any trapped air to escape and for the system to re-pressurize.
- Monitor the pressure gauge on the pressure switch. It should rise to the pump's cut-out pressure.
5. Re-energizing The System
Once you've completed the necessary maintenance or adjustments to your well water pressure system, it's time to re-energize the system and ensure everything is operating smoothly. Here's a step-by-step guide to safely turning the power back on to the pump and refilling the tank with water:
Turn Off Power -Before proceeding, ensure the power to the pump is switched off. This is crucial for safety during any maintenance or adjustment procedures.
Open Valves -If any valves were closed during the maintenance process, such as the main water supply valve or any bypass valves, make sure they are fully open to allow water to flow into the tank.
Turn On Power -Once you've confirmed that all valves are open, safely turn the power back on to the pump. This might involve flipping a circuit breaker or turning a power switch, depending on your system setup.
Monitor Pressure -As the pump begins to draw water into the tank, monitor the pressure gauge on the system. You should see the pressure gradually increase as the tank fills with water.
Check for Leaks -While the system is pressurizing, carefully inspect all connections, pipes, and fittings for any signs of leaks. Pay close attention to areas where you've performed maintenance or adjustments. If you notice any leaks, immediately shut off the power to the pump and address the issue before proceeding.
Ensure Proper Pressurization -Once the tank is filled with water and the pressure gauge indicates that the system is pressurized correctly, you can consider the re-energizing process complete.
6. Monitoring And Maintenance Tips
Adding air to your tank is just the initial step. Regular monitoring and maintenance will keep your system running smoothly and prevent potential problems.
Maintaining Optimal Pressure. Over time, some air may escape from the tank naturally, reducing the pressure inside. Low air pressure compromises the tank's effectiveness and can cause the pump to cycle on and off more frequently, leading to wear and tear.
Maintenance Routine
- Monthly Check-ups. Aim to check the air pressure in your pressure tank about once a month. Use a reliable pressure gauge for accurate readings.
- Inspect the tank. While checking, visually inspect the exterior of the tank for signs of leaks, corrosion, or other damage.
- Listen for unusual sounds. Pay attention to any unusual noises or changes in the way your pump operates. These could indicate developing problems.
When to Seek Professional Help?
Complex Issues. If you notice rapid pressure loss, waterlogged tanks, or any other issues that make you uncomfortable, don't hesitate to call a qualified plumber. Annual System Evaluations. Scheduling an annual checkup with a professional helps with preventative maintenance and ensures a healthy, efficient system.
See Also: 6 Vital Signs Your Well Pressure Tank Needs Replacement