Water wells stand as vital lifelines, providing precious fresh water for a multitude of purposes, from sustaining households to fueling agricultural endeavors and supporting commercial enterprises. Delving into the depths of their significance reveals a complex and captivating journey. How does water well drilling process work?The well drilling process emerges as a testament to human ingenuity, blending science with craftsmanship.
Anyone who hasn't experienced the procedure of drilling a water well may find the task intimidating. However, as long as you work with a skilled drilling contractor, you shouldn't feel intimidated by the idea of digging a water well.
Understanding Groundwater Sources
Groundwater, a vital resource for human consumption and various industries, comprises water stored beneath the Earth's surface in what are known as aquifers. These aquifers form in geological formations such as porous rocks, gravel, or sand, where water gradually infiltrates through the surface and accumulates over time.
Precipitation, such as rain or snow, contributes to the replenishment of groundwater as it percolates through soil layers, dissolving minerals and nutrients along the way.
The water then seeps downward until it reaches a depth where the geological conditions allow for its retention, forming underground reservoirs.
These aquifers serve as natural storage containers for freshwater, sustaining ecosystems and providing a reliable source for wells and springs. Understanding the dynamics of groundwater accumulation is essential for comprehending the origins and sustainability of well water sources.
Planning And Permitting
The journey of well drilling begins with meticulous planning and obtaining the requisite permits. Site selection stands as a crucial first step, involving careful consideration of geological conditions, proximity to potential contaminants, and accessibility.
Conducting a thorough water needs assessment follows suit, determining the volume and quality required to meet specific demands for residential, agricultural, or commercial purposes.
However, before breaking ground, securing the necessary permits from local authorities is imperative. This process involves adhering to regulatory guidelines and environmental standards, underscoring the significance of consulting with hydrogeologists or experienced well-drilling professionals.
Their expertise ensures not only legal compliance but also safeguards against potential environmental impacts. By navigating through these initial steps with diligence and expertise, one can lay the groundwork for a successful and sustainable well drilling project.
Choosing The Right Drilling Method
Drilling a well or taking soil samples requires the right tool for the job. Here's a breakdown of some common drilling methods to help you choose the most effective one for your project:
1. Rotary Drilling
How it Works -This method utilizes a rotating drill bit attached to a long drill string. Pressurized water or mud (referred to as "drilling fluid") then flushes the soil out of the hole after the bit has broken it down. Rotary drilling comes in two main types:
- Direct Rotary -Drilling fluid circulates down the drill pipe and backs up the space between the drill pipe and the borehole wall.
- Reverse Rotary -Drilling fluid circulates down the space between the drill pipe and the borehole wall and backs up the drill pipe.
Pros -Efficient for various depths and soil types, good for obtaining continuous soil samples.
Cons -Requires more equipment and expertise compared to other methods.
2. Cable-Tool Drilling
How it Works -This traditional method uses a heavy bit attached to a cable. The cable is repeatedly raised and dropped, pounding the bit into the ground and breaking up the soil. The loosened material is then removed with a bailer, a hollow tube with a check valve at the bottom.
Pros -Simple and reliable; works well in hard or consolidated formations.
Cons - Slower than rotary drilling, it may not be suitable for deep wells or obtaining continuous soil samples.
3. Direct Push Drilling (DPD)
How it Works -This method uses a hydraulic ram to push a hollow steel probe directly into the ground. Soil samples are collected through continuous sleeves or disposable samplers within the probe.
Pros -Fast, relatively inexpensive, minimal surface disturbance. Good for shallow sampling in soft to moderately hard soil.
Cons -Not suitable for deep drilling or very hard formations.
Choosing The Right Method
Several factors influence the best drilling method for your project:
Soil Composition -Rotary drilling is versatile for various soils, while cable-tooling is better for hard formations, and DPD is suited for soft to moderately hard soils.
Depth of Aquifer/Target Depth -DPD has a limited depth, while rotary drilling can reach deeper targets. Cable-tool drilling is generally good for moderate depths.
Volume of Water Needed -Cable-tool drilling may be sufficient for small water well needs, while rotary drilling is often used for high-volume wells.
The Drilling Process Explained
Rotary drilling is the most common method used for residential wells today. Here's a breakdown of the process involved:
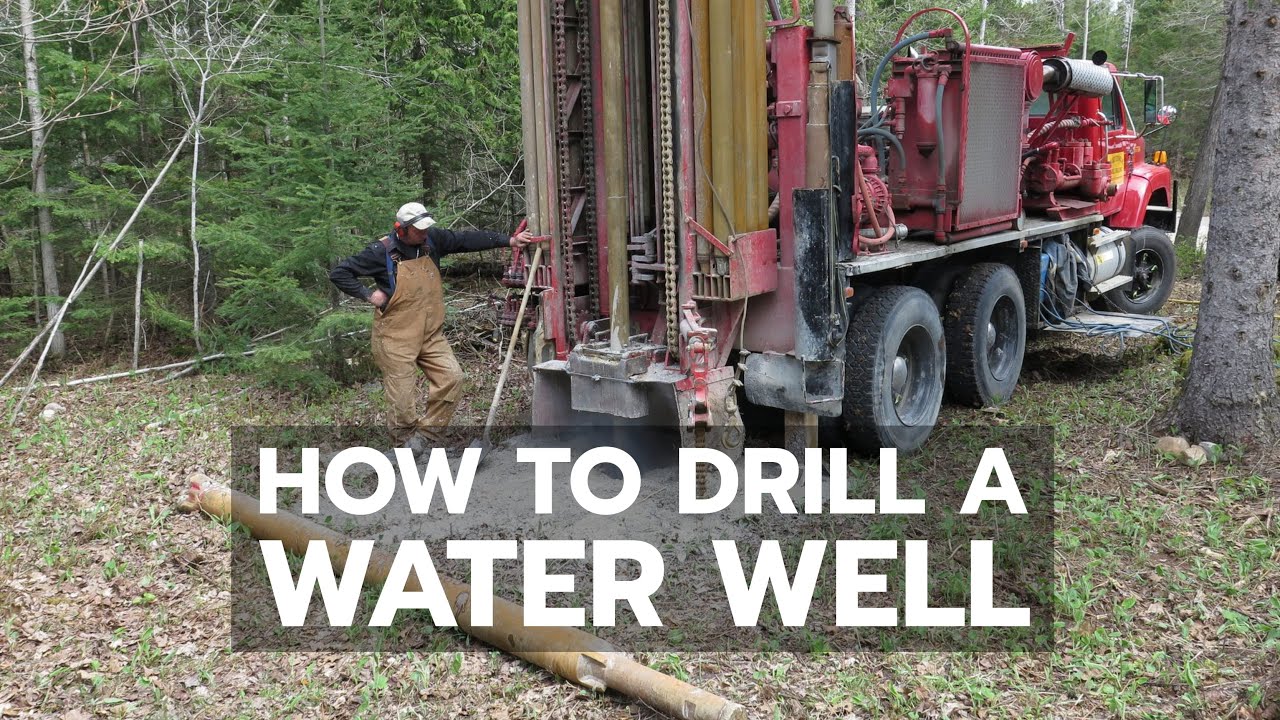
1. Setting Up The Drill Rig
- The drilling crew will arrive with a truck-mounted rotary drilling rig.
- Leveling jacks will be used to stabilize the rig on the designated drilling site.
- A steel or concrete pad may be laid down to support the rig and protect the ground.
2. Drilling The Borehole
- Cools and lubricates the drill bit.
- Suspends and removes drill cuttings from the hole.
- Stabilizes the borehole walls to prevent collapse.
- A drill bit, chosen based on the expected soil conditions, is attached to the end of a long drill string (pipes connected end-to-end).
- The rig's powerful motor rotates the drill string, forcing the bit to break up the soil.
- Drilling fluid (usually a mixture of water and bentonite clay) is constantly pumped down the drill string to back up the space between the drill pipe and the borehole wall. This fluid serves several purposes:
3. Removing Drill Cuttings
- The drilling fluid carrying the cuttings exits the borehole and flows through a settling tank or shaker system.
- The tank or shaker separates the cuttings from the fluid, allowing the cleaned fluid to be recirculated back down the drill hole.
- This closed-loop system minimizes waste and ensures continuous drilling.
4. Installing The Casing
- Once the desired depth is reached, a steel or PVC casing is lowered into the borehole.
- The casing is typically several feet shorter than the borehole depth to allow for the placement of a well screen below.
- The casing diameter is chosen to ensure a proper fit within the borehole and to accommodate the pump and water flow requirements.
- As sections of casing are lowered, they are typically welded together for a secure connection.
5. Sealing The Well
- After the casing is installed, a sealing material, often bentonite clay grout, is pumped into the space between the casing and the borehole wall.
- This grout fills any voids and prevents surface water or contaminants from entering the well from the surrounding soil layers.
6. Installing The Well Screen
- A well screen, a section of slotted pipe made of steel or PVC, is lowered into the bottom of the casing.
- The slots allow water to enter the well from the aquifer while filtering out sand and other particulates.
- The screen may be surrounded by a layer of gravel to further improve water flow and prevent sand from entering the well.
Water Testing And Development
Drilling a well is just one step in securing your own private water source. Before you turn on the tap, two crucial processes ensure clean, safe drinking water: well testing and development.
1. Water Testing - Why It Matters
You might think water looks clear and pure, but unseen contaminants can lurk beneath the surface. Testing your well water is essential for several reasons:
- Health Concerns -Contaminants like bacteria, nitrates, arsenic, or lead can be present in well water due to various factors like natural mineral deposits, agricultural runoff, or septic system malfunctions. Testing identifies these and other potential health risks.
- Treatment Needs -Test results can reveal if treatment systems like filters or softeners are necessary to address specific contaminants and make your water safe for drinking and household use.
- Peace of Mind -Knowing your water quality provides peace of mind. Regular testing (usually annually) helps monitor any changes in water quality over time.
2. Well Development - Clearing The Way For Clean Water
Even after drilling, the well may contain residual drilling fluids, sand, and other fine materials from the surrounding aquifer. This can cloud your water and reduce its flow. Well, development addresses this issue:
- Pumping Power -A high-volume pump is used to rapidly extract water from the well. This vigorous pumping action flushes out any remaining drilling fluids, sand, and fine materials that may be clogging the well screen and the surrounding formation.
- Improved Clarity -As development progresses, the pumped water becomes progressively clearer, indicating the well is being effectively cleaned.
- Enhanced Flow -By removing obstructions, development allows water to flow more freely from the aquifer into the well, ensuring a steady and sufficient water supply.
Pump Installation
Selecting and installing the right pump system is paramount for efficient water extraction from the well to the surface. The choice of pump system primarily hinges on the well's depth and the desired water yield. For shallower wells, a jet pump may suffice, drawing water to the surface using suction.
However, for deeper wells, submersible pumps prove more effective, as they are submerged directly into the water and can handle greater depths with higher efficiency. Additionally, the required water yield dictates the pump's horsepower and flow rate capabilities, ensuring adequate water supply for intended purposes.
Installation begins with positioning the pump at an optimal depth within the well, securely attaching it to the well casing or pump column. Proper sealing and insulation techniques prevent water leakage and ensure longevity.
Electrical connections are then carefully established, adhering to safety protocols and local regulations. Pressure tanks or control switches may be incorporated to regulate water flow and maintain consistent pressure levels within the system.
Regular maintenance and periodic inspections are essential to upholding the pump's performance and longevity. Monitoring water levels, inspecting pump components for wear or damage, and promptly addressing any issues ensure uninterrupted water supply and extend the pump's lifespan.
By selecting and installing a suitable pump system tailored to the well's specifications and water requirements, one can effectively harness groundwater resources for various applications with reliability and efficiency.
Final Steps And Maintenance
With a well-drilled, developed, and tested well, you're almost ready to enjoy the benefits of your own private water source. Here are the final steps and ongoing maintenance measures to ensure your well functions optimally for years to come:
1. Well Cap Installation
- A secure and properly vented well cap is installed on top of the well casing. This cap protects the well from contaminants like dust, dirt, insects, or even small animals that could fall in and pollute the water.
- The cap should be designed to allow for pressure equalization within the well casing to prevent buildup and potential damage.
2. Establishing A Maintenance Schedule
Just like any other system, your well requires periodic maintenance to ensure its continued functionality and water quality. Here's a basic maintenance plan to consider:
- Checking the well pump functionality and water pressure.
- Inspecting the well casing and seal for integrity.
- Measuring the water level within the well.
- Regular Inspections -Visually inspect the well cap and surrounding area every month for signs of damage, leaks, or tampering.
- Annual Checkup -Schedule a professional well inspection at least once a year. A qualified well service company can perform a comprehensive inspection that includes:
- Preventative Maintenance -Following these steps can help prevent problems and extend the lifespan of your well. Early detection of any issues allows for prompt repairs and avoids costly well failures down the road.